#
🚀 Getting Started
This guide will walk you through installation and initial setup so you can start managing network status detection like a pro. 💪
#
📦 Installation
Installing EazyNetChecker is quick and easy:
- Download and import EazyNetChecker from the Unity Asset Store.
- By default, the asset will be placed under
Assets/Hellmade/EazyNetChecker - EazyNetChecker requires the Newtonsoft Json package. Unity will prompt you to install it if it’s not already present in your project.
You can access the EazyNetChecker editor by navigating to Window > Hellmade Games > Eazy NetChecker > Main Window
This is your central hub for managing all your check methods and settings.
From this window, you can view, edit, create, delete, and organize your custom check methods.
#
⚙️ Setup
Initializing and setting up EazyNetChecker is super simple! You just need to:
- Generate required assets
- Initialize EazyNetChecker system for runtime use.
#
Generate required assets
Before you can use EazyNetChecker, you need to generate and initialize a few required assets. Without them, the system cannot function.
These assets include:
- A configurations asset
- 2 internal method database assets
When you first open the EazyNetChecker window, you’ll see a screen like this:
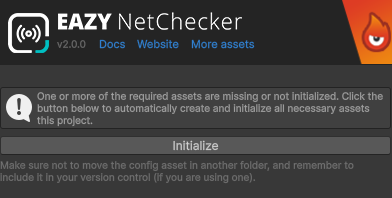
Click the Initialize button to automatically create all the required assets.
Why is this needed?
The config asset stores all settings for EazyNetChecker. The method database assets are used to store the built-in and custom methods data. They must all exist for the tool to function properly.
Once initialized, the assets will be created at the following path:
Assets/Resources/EazyNetChecker/EazyNetCheckerConfig.asset
Assets/Resources/EazyNetChecker/EazyNetCheckerBuiltInDatabase.asset
Assets/Resources/EazyNetChecker/EazyNetCheckerCustomDatabase.asset
Do not rename, move or delete any of these files!
These assets must stay exactly at this location with these names. If they are renamed or moved, the system will not be able to detect them.
Using version control?
We strongly recommend committing the required assets to your version control system. This ensures consistent behavior across machines and team members.
#
Update from legacy version
If you are upgrading from a previous legacy version of EazyNetChecker (1.x.x), you need to migrate your existing custom check methods to the new system, and adapt your code to the new API. Please refer to the Upgrade guide for detailed instructions on how to do, before proceeding with the rest of this guide.
#
⚙️ System Initialization
EazyNetChecker must be initialized before you use any runtime API, resolve methods, or create services. You have three options depending on how you structure your project.
#
Option 1: Use the static facade (Beginner-friendly)
Call EazyNetChecker.Initialize() once, then use the static API. This calls the default builder internally and wires everything up.
EazyNetChecker.Initialize();
Best for
Small to mid projects or when a singleton style API is acceptable.
👍 Fastest setup, minimal code.
👎 Less control over lifecycle and wiring.
#
Option 2: Build a system instance (Advanced)
Use this when you want full control or are using dependency injection. EazyNetCheckerSystemBuilder builds the system and also injects it into the static facade.
This way, You decide when the system is created and how to keep track of its instance, as well as how you pass around references to it or its subsystems. It is also useful more for tests or when switching gameplay contexts.
var builder = new EazyNetCheckerSystemBuilder();
var system = builder.Build();
Best for
DI setups, custom lifecycle management, tests, or multiple runtime contexts.
👍 Full control, easy to inject, no scene dependency.
👎 You manage when it is created and disposed.
Using DI?
EazyNetCheckerSystemBuilder.Build returns a EazyNetCheckerSystem instance. Use that in your DI containers.
#
Option 3: Use the Bootstrapper component
Add EazyNetCheckerBootstrapper to a scene. It can initialize in Awake automatically, or you can call InitializeSystem() yourself if you want manual timing.
public class MySceneScript : MonoBehaviour
{
    [SerializeField] private EazyNetCheckerBootstrapper netCheckerBootstrapper;

    private void Start()
    {
        netCheckerBootstrapper.InitializeSystem();
    }
}
Best for
Scene driven setups or teams that prefer editor based initialization.
👍 No code needed if Initialize In Awake is enabled.
👎 Requires a scene object and initialization timing depends on scene load.
#
🚀 Run your first check
With EazyNetChecker initialized, you can now run your first network status check! Here’s a quick and easy way to do it using the built-in global service.
// Access the global service
var globalService = EazyNetChecker.GlobalService;

// Start a single check
globalService.RunSingleCheck(result =>
{
    Debug.Log($"Check completed. Status: {result.Status}");
});
This is just a simple example to get you started. There are multiple ways of running checks and waiting/reacting to results. Check out the Services guide for more details on using services and running checks.